* Set bootloader to stm32-dfu for STM32F303 * Set bootloader to stm32-dfu for STM32F0x2 * Set bootloader to stm32-dfu for STM32F4x1 * Set bootloader to stm32duino for sowbug * Delete redundant bootloader_defs headers * Add some missing MCU name comments * Move APM32 dfu-suffix overrides underneath bootloader * Remove redundant STM32_BOOTLOADER_ADDRESS defines/rules |
||
|---|---|---|
| .. | ||
| rev1 | ||
| readme.md | ||
isometria75
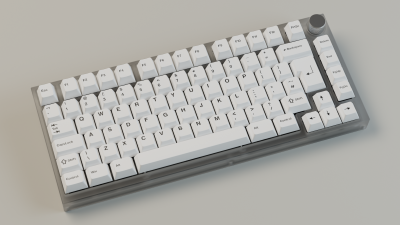
A 75% ISO-only board with a rotary encoder, RGB underglow and single color dimmable backlight. The hardware is ready to have Bluetooth support added later on. The design is open source and all files (PCB and case) can be found in my Github repo.
- Keyboard Maintainer: ebastler
- Hardware Supported: Rev1 PCB, see Github repo linked above
- Hardware Availability: None, feel free to order/manufacture parts yourself.
Bootmagic Lite key: Escape Physical reset switch present on the bottom of the PCB
Make example for this keyboard (after setting up your build environment):
make ebastler/isometria_75/rev1:default:flash
See the build environment setup and the make instructions for more information. Brand new to QMK? Start with our Complete Newbs Guide.
Default keymap layout binds
Layer 1 toggle: Right menu key (to the right of ralt, left of the arrow cluster) Layer 2 toggle: Right menu key + right shift key
Alternate layer mod keys (All on layer 1):
- Home: Insert
- Backspace: Delete
Alternate layer hardware control keys (All on layer 1):
- Esc: Enable/disable underglow
- F1/F2: lower/increase underglow brightness
- F3/F4: lower/increase backlight brightness
- F5/F6: lower/increase underglow hue
- F7/F8: lower/increase underglow saturation
- F9/F10: previous/next underglow effect
- F11/F12: lower/increase underglow effect speed
- Print Sreen: Shortcut to static underglow
Encoder mapping (Layer 0):
- CCW/CW: Decrease/Increase volume
- Click: Play/Pause
Encoder mapping (Layer 1):
- CCW/CW: Previous/Next track
- Click: Mute audio
Encoder mapping (Layer 2):
- CCW/CW: Screen brightness up/down
